Tuesday, November 25, 2008
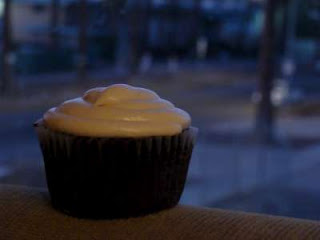
Turkey Day Corncakes
I'm not sure why I decided to make these, or even what inspired me. It may have been while I was reading Hello, Cupcake and saw the decorating ideas for the fake TV dinner. Then I thought of mashed potatoes, and how I could make "frosting" out of that. Then I thought that cornbread would make a good base for a cake. Then add turkey, a little cranberry, and voila! You have Thanksgiving Day in a Cup!!! Maybe I will call them that instead.
The more I thought about these, the worse of an idea it became in my mind. Cold mashed potatoes are nasty, and so is the crust that they get after being left out in the open air for too long. So I made a compromise. Stick with the original idea, but instead of "frosting" them, I will do the cone method and fill them with a cranberry chutney. I don't even know what chutney is really, but I will make something up. All I know is I should cook the cranberries and add some spices and sugar. Anyway, check it out. You can't say no to T-Day in a Cup.
Thanksgiving Day in a Cup
"Cupcake" Base
1 1/2 C all purpose flour
2/3 C sugar
1/2 C cornmeal
1 T baking powder
1/2 tsp salt
1 1/4 C milk
2 eggs
1/3 C oil
3 T butter, melted
3/4 C deli meat turkey, chopped
extra sugar for sprinkling
Preheat oven to 350 degrees F. Grease 18 standard sized muffin cups or lightly spray with cooking spray and line with paper liners. Set aside
In a medium sized bowl whisk together all the dry ingredients. In a separate, smaller bowl, thoroughly combine all the wet ingredients. Add the wet ingredients to the dry, mixing well. The batter will be slightly lumpy. Gently stir in the chopped turkey.
Scoop batter into muffin cups until they are 2/3 full. Do not overfill as this batter is fairly runny and will spill over if overfilled. If desired, sprinkle extra sugar on top for a little crunch (I like to use raw sugar). Bake for 18-22 minutes or until a toothpick inserted in the center comes out clean.
Cranberry Chutney
2 C whole cranberries, washed and drained
2/3 C packed brown sugar
1 1/2 T water
1/4 tsp cinnamon
pinch of ginger
Stir all ingredients together in a small saucepan until cranberries are coated. Cook over medium to high heat for 10-20 minutes. Depending on the consistency you want, the less it is cooked, the more solid the cranberries will be and the sauce will be more liquid. The more it is cooked, the mushier the cranberries will be, but the sauce will be thick and slightly gelatinous.
Assembly
Cut a small 1 inch diameter conical shape out of the top of the cakes. See here to better understand the "cone method" of filling cupcakes. You can choose to cut off the pointy part or you can just smoosh it into the cake a little bit and not waste anything.
Using a very small cookie scoop or a tablespoon, fill the cake centers with cranberry chutney and replace the top of the cake. These can be served warm or at room temperature. A quick microwave can bring back nostalgic memories of T-Days past.
Another Order!
Right now I am getting really frustrated with certain things. I want a bakery so bad it hurts. I spend every moment thinking about how I want to design the inside, what I want it to look like, what I want to name my cupcakes... you get the idea. It's all nice to think about until you feel like your dream keeps floating away. This stuff costs money. A lot of money actually. I don't have that money. I can't get a loan, at least not right now. My patience is terrible. Then I go and watch shows like Kitchen Nightmares and see people having restaurants they don't deserve to have. If I had a fraction of their money, I could have my bakery and thrive. It's all I want right now. Actually, for once in my life, it is something I am 100% sure of. Well, I take that back, because I had no doubts about my husband. But as far as material things go, this is it. This is what I want to do with my life. This is what I love.
I really needed to get that out there. My husband can only hear me say it so many times. He's so supportive, and I think he wants it as bad as I do. His reasoning may be different, but ultimately, he wants to make me happy. I'm so lucky. I suppose I should stop complaining.
I get so excited when someone asks if they can "hire" me to make cupcakes for them. It's so exciting and it kind of validates my love of baking. One of my coworkers, Joette, asked if I could make her a dozen cupcakes for T-Day for her. I didn't really have to ask what kind she wanted, because I already knew her answer. Red Velvet. Yay, I love tasting the leftover batter. It's so tangy and sweet and perfect.
Here's the recipe for the Red Velvet Cupcakes with Cream Cheese Frosting that I am making for Joette. Hooray 15 bucks for 12 cupcakes.
Red Velvet Cupcakes with Cream Cheese Frosting
Cupcakes
2 1/2 cups all-purpose flour
1 1/2 cups sugar
1 teaspoon baking soda
1 teaspoon salt
2 Tablespoons cocoa powder
1 1/2 cups vegetable oil
1 cup buttermilk, room temperature
2 large eggs, room temperature
2 Tablespoons red food coloring (you can omit this, I usually do)
1 teaspoon white vinegar (lemon juice is okay too)
1 Tablespoon vanilla extract
For the Cream Cheese Frosting:
1 pound cream cheese, softened
2 sticks butter, softened
1 teaspoon vanilla extract
4 cups sifted confectioners' sugar
For the cupcakes:
Preheat the oven to 350 degrees F. Line 2 (12-cup) muffin pans with cupcake papers.
In a medium mixing bowl, sift together the flour, sugar, baking soda, salt, and cocoa powder. In a large bowl gently beat together the oil, buttermilk, eggs, food coloring, vinegar, and vanilla with a handheld electric mixer. Add the sifted dry ingredients to the wet and mix until smooth and thoroughly combined.
Divide the batter evenly among the cupcake tins about 2/3 filled. Bake in oven for about 20 to 22 minutes, turning the pans once, half way through. Test the cupcakes with a toothpick for doneness. Remove from oven and cool completely before frosting.
For the Cream Cheese Frosting:
In a large mixing bowl, beat the cream cheese, butter and vanilla together until smooth. Add the sugar and on low speed, beat until incorporated. Increase the speed to high and mix until very light and fluffy.
Sunday, November 23, 2008
Muffins for My Stud Muffin
Now you definitely want to try them don't you? These will certainly appeal to some people. I have a serious sweet tooth, and the sweeter it is, the better it is for breakfast. These are hearty and dense muffins, so be prepared.
Peanut Butter and Chocolate Chip Muffin Cakes
2 C self rising flour
1/3 C raw sugar
1 1/2 C dark chocolate bits
1 egg
1 C crunchy peanut butter
2 T strawberry jam
1/4 C (1/2 stick) butter, melted
3/4 C milk
Preheat oven to 350 degrees F. Grease a 12 cup muffin pan.
Sift flour into a large bowl. Stir raw sugar and chocolate bits into the flour until combined.
In a separate bowl, mix together the egg, melted butter, milk, jam, and peanut butter. Mix thoroughly.
Make a well in the center of the bowl with the flour and pour in the liquid mixture. Using a wooden spoon, stir everything together until combined. Be careful not to overmix or muffins will be very tough.
Scoop equal portions of dough into the muffin cups. The recipe makes enough for 12 muffins. The cups can be filled completely to the top as this is a very sturdy muffin and will not spill over.
For a nice crunch, I like to sprinkle raw sugar over the tops of the muffins and lightly press down.
Bake for about 20-25 minutes or until a toothpick inserted in the center comes out clean.
Thursday, November 20, 2008
It's Never Too Early For Chocolate
After sending Glenn three links for muffins containing chocolate, he chose the one from Nigella Lawson. I've never actually tried any of her recipes before, so this was my first time. Apparently she is British and the recipe on foodnetwork's website is converted from metric measurements. (seriously, why do we have to be the odd ones out in the states and use stupid things like cups and inches? why can't we be normal like everyone else in the world and do meters and grams?) I looked through the comments on the recipe to confirm that these were good and I should try them, and instead I get a bunch of complainers who say that the recipe is wrong and should actually be 1 3/4 C sugar, and that the conversion is wrong. Ummm, say what now? There is plenty of sugar in these muffins... they are muffins after all, not cupcakes. Whatever, I made the recipe as written and these are nice and fluffy muffins with plenty of melty chocolate bites. I was a bit deceived though, because I thought these were double chocolate, but really, the batter is a light chocolate flavor meant to enhance the chocolate chips. These are perfectly not too sweet and chocolatey, perfect for breakfast.
Chocolate Chocolate Chip Muffins
1 3/4 cups all-purpose flour
2 teaspoons baking powder
1/2 teaspoon baking soda
2 tablespoons best quality cocoa powder
3/4 cup superfine sugar
3/4 cup semisweet chocolate chips, plus 1/4 cup for sprinkling
1 cup milk
1/3 cup plus 2 teaspoons vegetable oil
1 egg
1 teaspoon pure vanilla extract
Special equipment: Muffin tin with paper muffin cases
Preheat the oven to 400 degrees F.
Put the flour, baking powder, baking soda, cocoa, sugar, and 3/4 cup of the chocolate chips into a large bowl. Pour all the liquid ingredients into a measuring jug. Mix the dry and wet ingredients together, remembering that a lumpy batter makes the best muffins. Spoon into the prepared muffin cases. Sprinkle the remaining 1/4 cup chocolate chips on top and then bake for 20 (I suggest a minute or two shorter in time) minutes or until the muffins are dark, risen and springy.
Tuesday, November 18, 2008
Everything Is Black and White
The drain is the reason I made cookies and not cupcakes today. Cupcakes are time consuming, but worth it. However, since I have not been sleeping well, I decided to do something that would not require me to be up all night since I wasn't getting started until roughly 7 pm. The cookies took me an hour. Yay.
These cookies are wickedly chocolate in flavor (it uses a cup and a quarter of cocoa!) with a nice touch of super sweetness every time you bite into a white chocolate chip. This is one of my favorite kinds of cookie. My favorite is from Paradise Bakery actually, the yummy little chippers. I used to work there actually, and I had access to ALL of the recipes, but I am apparently too stupid to have written the best ones down. Oh well. These are great cookies, you should try them, and they are really easy to make too.
One more thing. I have discovered the amazing baking ingredient that is Hershey's Special Dark Cocoa. Even better is I have discovered it for only $2.34 at Super Target. But now to the bad news. I only bought one container to try for a certain recipe a while ago. That is when I realized how much I was missing by using regular cocoa. So I went back to Target, and guess what. No HSDC. I ask the boy and he says they receive new stock the next day. We go in a couple days later, no HSDC. GRRRR... I'm getting angry now. I have since been back to the same Target about 5 more times and every single time, no HSDC. I come to notice that they haven't even been restocking their regular cocoa. What is up with this? Hello!!!! Holiday baking people, we need HSDC! How frustrating. Whenever I see it in stock though, I am going to get all Supermarket Sweep on the shelf and just knock every single container of HSDC in my cart. I gotta stock up. Phew.... vent over.
1 3/4 cups flour
1 1/4 cups cocoa powder
1 cup white sugar
3/4 cup brown sugar
2 tsps. baking soda
1 cup butter
2 eggs
1 tsp. vanilla
1/4 tsp. salt
2 cups white chocolate chips
1. Preheat oven to 350 degrees and grease cookie sheet.
2. In a large bowl, cream together the butter, brown sugar and white sugar until light and fluffy. Add eggs one at a time, beating well with each addiction. Add the salt and vanilla.
3. In another bowl, combine the flour, cocoa and baking soda and gradually add to the creamed mixture. Fold in chocolate chips. Drop by rounded spoonfuls onto the prepared cookie sheet.
4. Bake for 8 to 10 minutes until fluffy but still soft. Allow cookies to cool on baking sheet for 5 minutes before removing to a wire rack to cool completely.
Yields about 36 cookies
Recipe Courtesy of Genesis of a Cook
Fourth of November?
Me: So, what do you want?
Kid: Um, we need 20.
Me: Okay, you want 20 cupcakes of what flavor??
Kid: Vanilla is cool.
Me: The same ones I made for homecoming?
Kid: Yeah, those are good.
Me: You guys are really boring, I have better flavors than vanilla. What do you want on it?
Kid: Just patriotic stuff... like red, white, and blue.
Me: ... Uh, like fourth of july patriotic?
Kid: Yeah, that's cool.
Me: ... Ok, I guess, I will have them ready tomorrow. Bring 14 bucks.
So yeah. They wanted patriotic cupcakes. I was weirded out. It's November now in case you haven't noticed. The colors of the season are more along the lines of orange, yellow, and brown. Whatever, they really really liked them. I was pretty pleased with the way they came out too. I thought they were cute.
By the way, the patriotic theme was apparently because last week was patriotic week. Okay... whatever. These kids are spoiled. I never got cupcakes in high school. Then again, we didn't have a cool baker like me :o)
Vanilla Cupcakes (yield 2 dozen)
2 3/4 cups all purpose flour
2 teaspoons baking powder
1/4 teaspoon salt
2 sticks butter
2 cups sugar
4 eggs
1 cups milk
1 tablespoon vanilla extract
Sift together flour, baking powder, and salt and set aside. Beat butter for about a minute until it is light and fluffy. Gradually add sugar until mixture is light and fluffy, about 3 minutes. Add eggs, one at a time until they are incorporated. Add 1/3 of the flour mixture and mix until incorporated. Add 1/2 of the milk combined with vanilla and mix until incorporated. Repeat and end with the flour mixture. Spoon batter into lined muffin tins and bake at 350 degrees F for 20 minutes.
Sunday, November 16, 2008
Stick To It
Well my friends, today I made that coffee cake. I even got to bust out my awesome food processor to make the crumb part, and that was fun. However, when I finished making the batter I was instructed by the all knowing book to put the batter in a greased springform pan, and spread the batter around and 2 inches up the sides. This was not good. The batter is SUPER sticky. I even put on some rubber gloves and greased 'em up with a ton of shortening, and still, it stuck to me. Then I thought to myself, there is no way I am going to get this batter to stick 2 inches up the pan. So I mushed and I mushed and I mushed until I had what sort of resembled crust going up the side of the pan. We'll see.
*** Update - This is really really tasty. However, the bread part of it cooks much faster than the cream cheese part. It oozes everywhere, but it tastes better all runny. I am going to adapt this into a muffin recipe so it is easier to handle and enjoy.
Here is the recipe for your own enjoyment, but don't say I didn't warn you about the stickiness.
Raspberry Cream Cheese Coffee Cake
2 1/4 C flour
3/4 C sugar
3 T packed brown sugar (I added this in for personal reasons)
3/4 C cold butter
Mix flour and sugars together until well blended. Cut in cold butter until mixture forms crumbs. Remove 1 C and set aside to use as topping.
1/2 tsp baking powder
1/2 tsp baking soda
1/2 tsp salt
3/4 C sour cream
1 egg
1 tsp vanilla extract
Add baking powder, baking soda, salt, sour cream, extract, and egg to the crumb mixture and mix well until a very thick batter forms. Pour into a greased 9 inch springform pan and push batter 2 inches up the sides (I will be impressed if you can actually manage that.) Set aside.
8 oz cream cheese, softened
1/2 C sugar
1 egg
1/2 C preserves (raspberry in this case)
Mix cream cheese, sugar, and egg together in a small bowl until very smooth. Pour over the batter and smooth. Spoon preserves over cream cheese filling and spread. Sprinkle reserved crumbs over cake. Bake at 350 degrees F for 50-60 minutes.
Wednesday, November 12, 2008
I'm Getting Published!
They said my combination of flavors were really interesting and that they worked very well together. I got lots of compliments and congratulations that night. I also won a $3o gift certificate to MacAlpines restaurant as well as my picture taken with the lovely judges and my recipe is going to be published in the Coronado Dispatch magazine. How exciting!
It was doubly nice because my mom and dad decided to show up to support me. Even cooler that they got to see me win! Anyway, I am just being self-congratulatory here, so humor me.
I Cheated
Anyway, last night I discovered that Hulu has added the food network. I promptly watched anything and everything that sounded good to me. Also, for the first time I watched Paula Deen in action. What an interesting woman she is. The particular clip I watched was for Gooey Butter Cake, but the cheater way. Glenn was bugging me to make him something sweet, but we didn't have much in the house that would be quick for me to put together. It was 8:00pm. I asked him if he wanted the Gooey Butter Cake and he agreed. Well, I didn't have yellow cake mix so I used Devil's Food Cake mix instead. (I keep one of those in reserve at all times in case I get a craving for a certain, amazing cake.)
I cheated. So shoot me. I made the cake, which was super easy. It was boring though, mostly because I do like somewhat of a challenge. At least cleanup was easy. Here is the recipe as presented by Paula Deen. She encourages creativity in the way of adding random stuff to the filling, and in that particular clip she added a small can of pumpkin puree. Yum.
Gooey Butter Cake
Crust
1 box (18 1/4 oz.) cake mix (any flavor works)
1 stick (8 T) butter, melted
1 egg
Filling
1 pkg (8 oz.) cream cheese, softened
2 eggs
1 stick (8 T) butter, melted
1 box (16 oz.) powdered sugar
1 tsp vanilla
Preheat oven to 350 degrees F. Lightly grease a 13 x 9 pan. To make the crust, combine the cake mix, butter, and egg in a medium bowl and mix with an electric mixer until thoroughly combined. Press mixture into the greased pan and set aside. For the filling, first beat the cream cheese (you can use the same bowl) until it is smooth. Add the eggs, butter, powdered sugar, and vanilla. Mix with electric mixer until very smooth. Pour filling over the crust. Tap the pan on the counter a couple times to get out any bubbles. Bake in the oven for 40-50 minutes. It will still be a little jiggly when it is done. Do not overbake or your crust will dry out. Wait about 20 minutes before cutting and serving.
Wednesday, November 5, 2008
Desserts in the Desert
Anyway, that being said, there is also an event going on at that same time called 7th on 7th. There is going to be a dessert contest, to which Glenn "suggested" I participate. I am never one to back down on a competition, especially when I am working on getting my name out there so once I get my bakery up and running, people already know me. OH! By the way, here is my site for my soon to be bakery, location TBD, name: Seventh Inning Sweets. Cute huh? Glenn actually created the site, I am so proud of him. He's a stud.
Aside from that, my creation for this dessert contest is a chocolate cupcake with a pumpkin mousse filling and a dulce de leche frosting. I really hope this all tastes good together. I have no idea, it just sounded like a good seasonal idea. I went to the farmers market today in hopes that they would have pumpkin so I could boast that I used a local ingredient, but alas, they did not. Boo. The dulce de leche is cooking away and I just made the "mousse" and it is so yummy! I will share the recipe with you, that way you can say that you knew me way back when I was getting my start winning dessert contests. The winner gets their recipe published in one of our local magazines along with a gift card to a local business.
Chocolate Cupcakes
1 C salted butter (the added salt is a nice complement)
1/2 C + 1 T Hershey's Special Dark cocoa sifted (this kind tends to clump, A LOT)
3/4 C water
2 C granulated sugar
1/2 C buttermilk
1 1/2 T vanilla extract
2 eggs
2 C flour
1 t baking powder
1/2 tsp. salt
1/2 tsp. baking soda
Preheat oven to 350 degrees F. Line 2 12-cup muffin pans with liners and set aside. Over low heat, melt butter in a medium sized saucepan. While butter is melting, combine flour, baking powder, salt, and baking soda in a small bowl and set aside. When butter is completely melted, add in cocoa and whisk until very smooth. Add in water and whisk again. Turn off heat and whisk in the sugar until the batter has a smooth appearance. Add in the buttermilk and vanilla extract, whisking again. Add in one egg at a time, whisking until thoroughly combined after each addition. Very slowly add in the dry ingredient mixture, whisking very well after each addition (this batter tends to clump up, and it is essential to get it as smooth as possible). Fill each muffin cup 1/2 full (flat tops) to 2/3 full (domes) and bake for 20 minutes. A toothpick inserted into the center of a cupcake will come out with a few crumbs clinging to it or completely clean when they are done. Allow to cool on a wire rack completely before filling and frosting.
Pumpkin Mousse Filling
1 C pumpkin puree
1/4 C milk
1/4 C vanilla pudding (about 1/2 a packet in a 3.4 oz pacakge)
1/4 tsp cinnamon
1/8 tsp nutmeg
8 oz container cool whip, thawed
In a medium bowl combine the pumpkin puree, milk, pudding, and spices. Mix well with an electric mixer on medium for 1 minute. Spoon the cool whip on top of the pumpkin mix. Very gently fold cool whip into the pumpkin.
Dulce De Leche (store bought works as well as caramel ice cream topping)
1 14oz can sweetened condensed milk
Empty can of sweetened condensed milk into a pie plate or shallow baking dish. Place dish in the middle of a larger baking dish (a roasting pan works best.) Fill outer pan with water until it reaches halfway up the sides of the center dish. Tightly cover the center dish with aluminum foil. Bake at 425 degrees F for 60-75 minutes. When finished it will be a caramel brown color. (the longer it "caramelizes" the deeper and richer the flavor)
Dulce De Leche Frosting
1 stick butter (I prefer salted for this job)
1/3 C dulce de leche
2 teaspoons vanilla
2 T milk
2-2 1/2 C powdered sugar (you may use more or less depending on how you like your frosting)
In a medium bowl, combine butter, dulce de leche, vanilla, and milk. Mix until well blended with an electric mixer. In half cup increments, add the powdered sugar until completely mixed in. Do this until the frosting is at the desired consistency. Spread on cooled cupcakes.
Tuesday, November 4, 2008
Bwah Ha Ha Ha!
Happy Halloween... A Few Days Late
I have no idea what is happening to me, but I am so overwhelmed with pretty much everything at the moment. I am waaayyyyy behind in blogging! Anyway, I made Halloween sugar cookies the day before Halloween. They are my absolute favorite recipe in the entire world. They are soft, light, just sweet enough, and thick. Yum. I hesitate sharing it because I would hate if someone defiled my mom's delicious recipe. I will be a good blogger though, and share it with you. Proceed with caution.
Mom's Sugar Cookies
(1)
1 C butter
1 1/2 C sugar
1 egg
1/2 C sour cream
1 tsp vanilla
(2)
4 C flour
1 tsp baking powder
1/2 tsp baking soda
1/2 tsp salt
1/2 tsp nutmeg
Frosting
3 C powdered sugar
1/3 C very soft butter
1 1/2 tsp vanilla
2 T milk
Preheat oven to 375 degrees F. Mix all of (1) together in a large bowl. Add all of (2) gradually. Refrigerate dough for an hour or 2. Roll out dough very thick, about 1/4 inch, and cut into shapes. Bake for 8-11 minutes. Let cool on a wire rack. Mix all frosting ingredients until very smooth. Frost and decorate cooled cookies.
I Am NOT On the Bacon Train
These were fairly simple cupcakes to pull together, requiring only 15 or so minutes of my time in preparation. The batter is amazing, and quite possibly the best chocolate batter I have ever tasted. While I was doing that, Glenn was cooking the bacon for me and dry heaving over the thought of chocolate and bacon. I didn't taste the batter post bacon addition though. They baked up absolutely beautiful. They had nice round domes and were quite springy to the touch. I think I have a winner here.
The frosting, oh the frosting... Hershey's Special Dark Cocoa is my new best friend. That stuff makes the most INCREDIBLE chocolate frosting I have ever had. So rich and chocolate and sinful. I loved it. I was kind of in a rush to finish and frost the cupcakes, so I didn't really get to play with the frosting and tweak it like I usually do, but followed exactly, the recipe is amazing.
I finally bought one of those awesome little 1M tips for frosting and I love it. Those swirls are just so pretty, I cannot get over it. After I frosted the cupcakes I put an assortment of plastic "toys" on the tops of them. I wanted all piggies but the cake decorating shop was all out and only had the combo farm animal bags. I stuck a nursing mama pig on one, a lizard on another (to represent my Bro's iguana), a fish (his love of fishing) and then a Happy Birthday pick of course.
Once we finally got around to giving Jeff his cupcakes, he took a bite and we all stared. A little weirded out by this staring, Jeff started to laugh and became overly cautious about eating these "mystery cupcakes." I forgot to add I didn't tell them what kind they were. When we asked them if he could taste something special in them he said "I dunno." When directed to take a hint from the pig on the cupcake, he said "milk?" Needless to say I about died from laughter after hearing that. Finally he crunched into a hearty piece of bacon and exclaimed "Bacon!" I'm not sure if he really liked them, if he ate it beacuse he eats anything, or if he was just being polite. My mom spit a bite of hers out. She was disgusted. I tried one a couple days later at lunch and did the same thing. I'm sorry, that combo is revolting.
I wanted so badly to like bacon and chocolate. I love bacon. I love chocolate. How could they not be great together? Sadly, I cannot board the chocolate bacon train with everyone else. I guess I will remain boarded on the peanut butter chocolate boat with the rest of the world. Here's the recipe in case you are interested. I found it on a blog called A Good Appetite. The frosting recipe is awesome and the chocolate cupcakes are super moist and lovely. I will certainly make these again, sans bacon of course.
Dark Chocolate & Bacon Cupcake
8 slices good thick-cut bacon
1 c unsalted butter
1/2 c Hershey's Special Dark Cocoa
3/4 c water
2 c granulated sugar
2 large eggs
1/2 c well-shaken buttermilk
2 T vanilla
2 c all-purpose flour
1/2 t baking soda
1 t baking powder
1/4 t salt
Preheat oven to 350 F. Prepare 24 muffin tins.
Chop bacon into about 1/2-inch pieces. Cook over med-high heat in a skillet until bacon is brown & crisp. Remove bacon with a slotted spoon to a paper towel to drain. Pat any remaining oil off the bacon. Set aside.
Melt butter in a large heavy saucepan over moderately low heat, then whisk in cocoa. Add water and whisk until smooth. Remove from heat. Whisk in separately sugar, eggs, buttermilk, and vanilla. Sift flour, baking soda, baking powder, and salt into the cocoa mixture and whisk until just combined (it will be a little bit lumpy). Stir in bacon.
Fill muffin tins to about 2/3 full. Bake for 20 minutes until a skewer or toothpick comes out clean. It's a moist cake, so don't worry if a few crumbs stick to your tester.
Allow cupcakes to cool.
Makes 24 cupcakes.
Dark Chocolate Frosting
1/2 c unsalted butter
2/3 c Hershey's Special Dark
3 c powdered sugar
1/3 c milk
1 t vanilla extract
Melt butter. Stir in cocoa. Alternately add powdered sugar and milk, beating to spreading consistency. Add small amount additional milk, if needed. Stir in vanilla.
About 2 cups frosting.